Achieving a flawless tile installation can transform any space, whether it’s a kitchen backsplash, bathroom floor, or living room accent wall. While DIY projects can be rewarding, tile installation requires precision, patience, and the right techniques to ensure a professional finish. Whether you’re a beginner or a seasoned DIYer, following these tips can help you achieve results that look like they were done by an expert.
1. Choose the Right Tiles and Materials
The first step to a successful tile installation is selecting the right tiles for your space. Consider the area’s traffic, moisture levels, and design style. Porcelain and ceramic tiles are popular for high-traffic areas due to their durability, while natural stone tiles add elegance but require more maintenance. In addition to tiles, gather quality materials such as a notched trowel, tile spacers, adhesive, grout, and a level to ensure your work is precise.
2. Prepare the Surface Properly
One of the most common mistakes in tile installation is neglecting surface preparation. The surface must be clean, dry, and level before you begin. Remove any old flooring, dust, grease, or debris that could interfere with adhesive bonding. For uneven surfaces, apply a leveling compound to create a smooth, flat foundation. Proper preparation prevents tiles from cracking, shifting, or creating uneven grout lines over time.
3. Measure and Plan Your Layout
Planning your tile layout before applying adhesive is crucial for a professional finish. Measure the area and mark a central guideline using a chalk line to ensure symmetry. Dry-lay a few tiles to visualize the pattern and spacing, making adjustments as needed. This step helps you avoid awkward cuts at walls or corners and ensures that the tiles are evenly spaced and aligned throughout the installation.
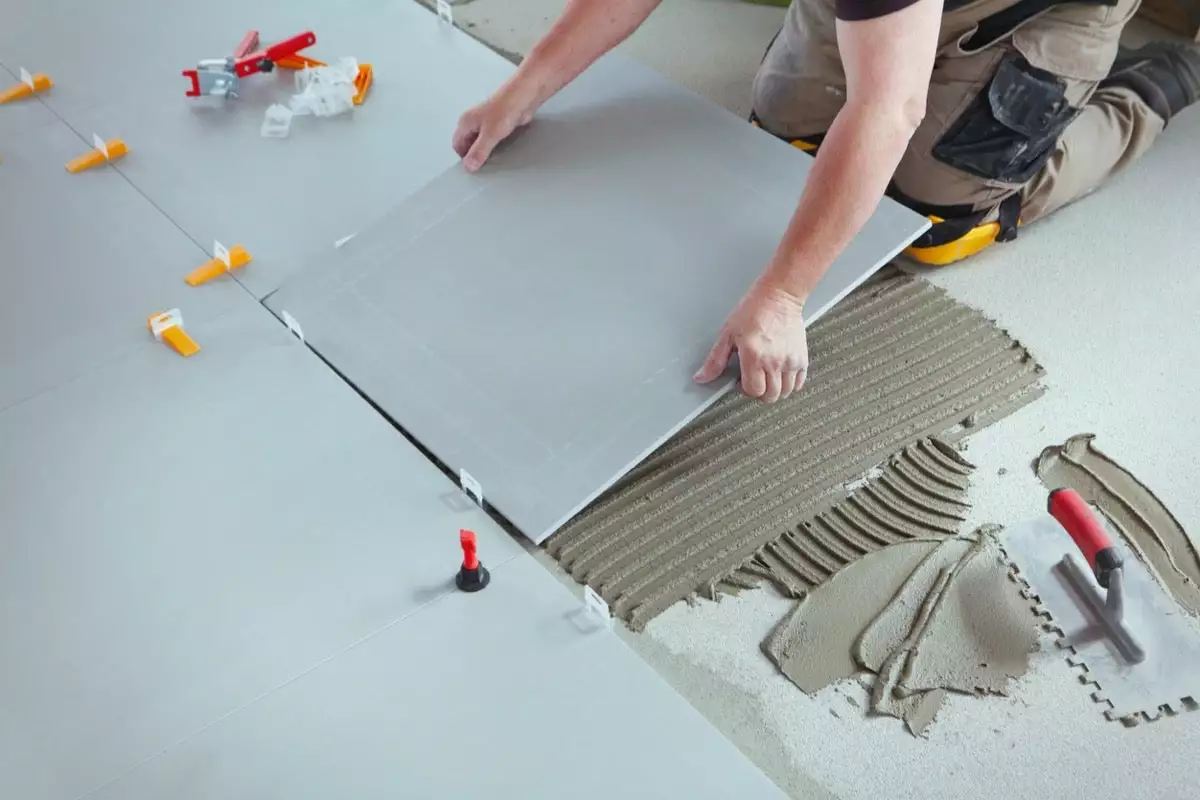
4. Use the Right Adhesive and Technique
Choosing the right adhesive for your tile type and surface is essential. Spread adhesive evenly with a notched trowel, applying consistent pressure to avoid gaps underneath the tiles. Press each tile firmly into the adhesive while twisting slightly to secure a strong bond. Using tile spacers ensures even gaps for grout, which contributes to a polished, professional appearance.
5. Cut Tiles Accurately
Cuts are inevitable, especially around edges, corners, or fixtures. Use a high-quality tile cutter or wet saw to make clean, precise cuts. Measure twice and cut once to avoid mistakes. Sand the edges of cut tiles if necessary to create smooth edges that seamlessly integrate with the surrounding tiles. Precise cuts enhance the overall finish and prevent noticeable flaws.
6. Grout and Seal Properly
Once the tiles are set and adhesive has dried, it’s time to grout. Apply grout using a rubber float, pressing it into the gaps and removing excess with a damp sponge. Allow the grout to cure fully according to the manufacturer’s instructions. For porous tiles like natural stone, apply a sealant to protect against moisture and stains. Proper grouting and sealing are key to both appearance and longevity.
7. Maintain Clean Lines and Regular Maintenance
Finally, inspect your installation for any uneven lines, gaps, or excess grout and correct them promptly. Regular maintenance, such as cleaning grout lines and tiles, ensures your tile work remains beautiful for years. A well-installed tile surface not only elevates your space visually but also increases its value and durability.
By following these tile installation tips, you can achieve a professional finish every time. Careful planning, proper preparation, and attention to detail make all the difference between a good-looking project and one that truly impresses. Whether tackling a small backsplash or a full bathroom floor, these strategies will help you install tiles with confidence and precision.